Building an RC Car with a Custom Remote Control, Light, and Sound
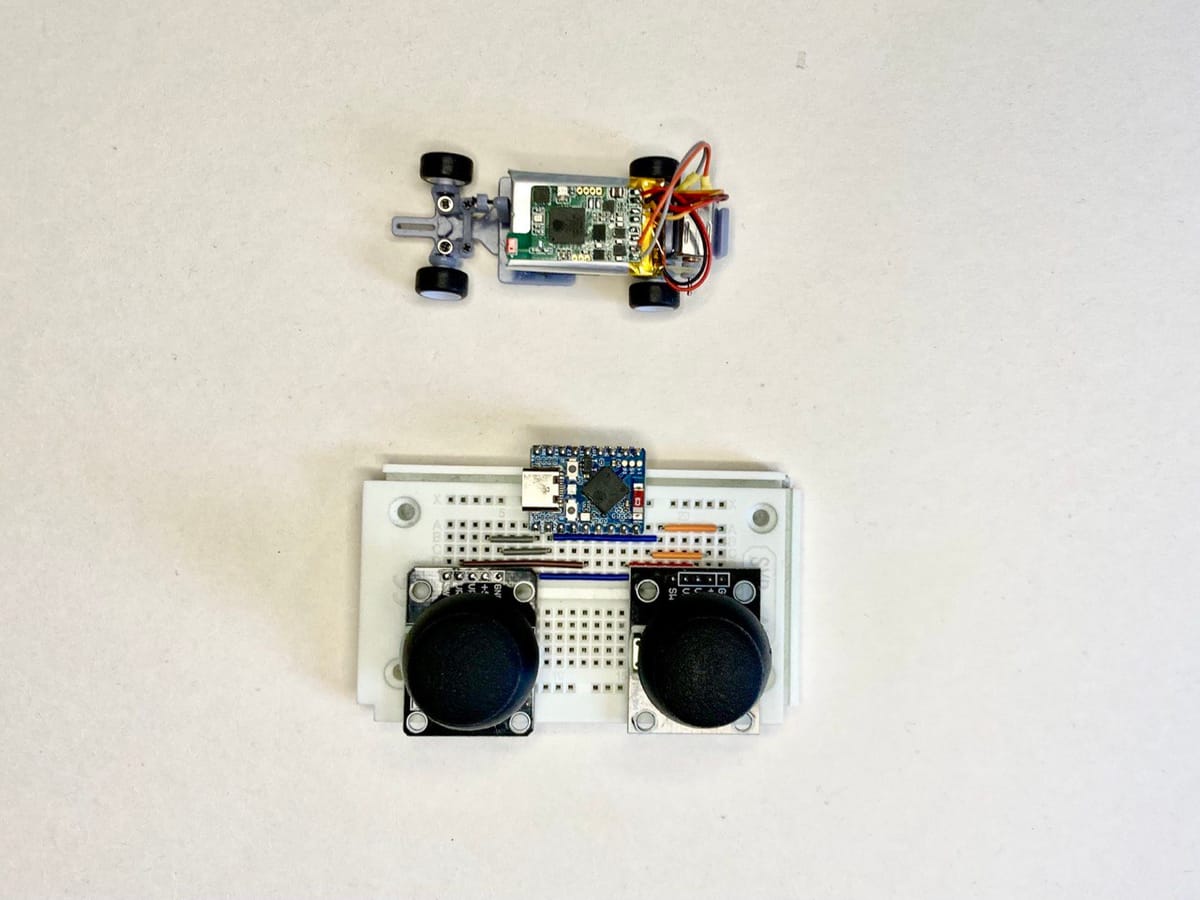
In this guide, I’ll show you which electronics you need to build an RC car featuring a servo motor (for steering), a DC motor (to move the car forward and backward), lights, and sound. If you enjoy programming, you can customize the firmware (based on Arduino and ESP32XX SOCs). However, if you don’t know how to program, you can use Loco.Engineering circuits (or modules) with pre-built firmware.
Electronics Required for the RC Car:
- Servo Motor
Used to turn the front wheels left or right. If space is limited, you can replace the servo motor with a DC motor and potentiometer. - Brushed DC Motor
Powers the movement of the car forward and backward. - Control Circuit or Board
Receives messages from a mobile device or computer over WiFi, or from a custom remote control.- Recommended: Use the Loco.Engineering RC car module.
- Alternative: Build your own control board using an ESP32S3/C3 module, a DC motor driver, a battery controller, and an audio amplifier (if sound functionality is desired).
- Battery (Li-Poly/Li-Ion, 3.6V)
The capacity depends on your car's scale. For example, 100–150 mAh works well for 1:64 scale cars (e.g., Hot Wheels). - (Optional) Joystick Modules and an ESP32S3/C3 Development Module
These are for building a custom remote control. You can also control the car directly from mobile devices or a computer over WiFi.
Connections
Loco.Engineering RC Board Outputs
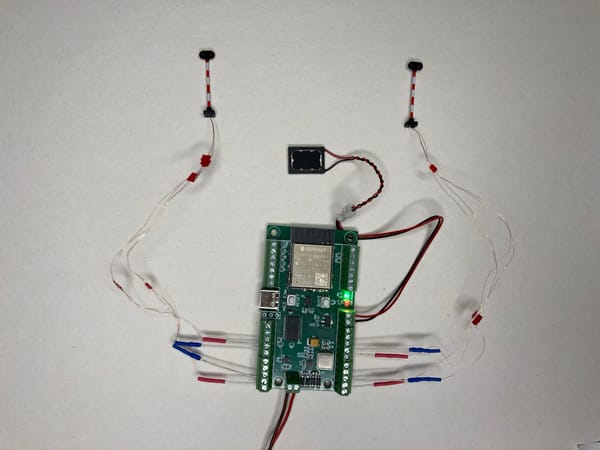
The Loco RC board includes all the necessary outputs to connect a servo motor, DC motor, lights, and sound. Below is a guide to wiring each component.
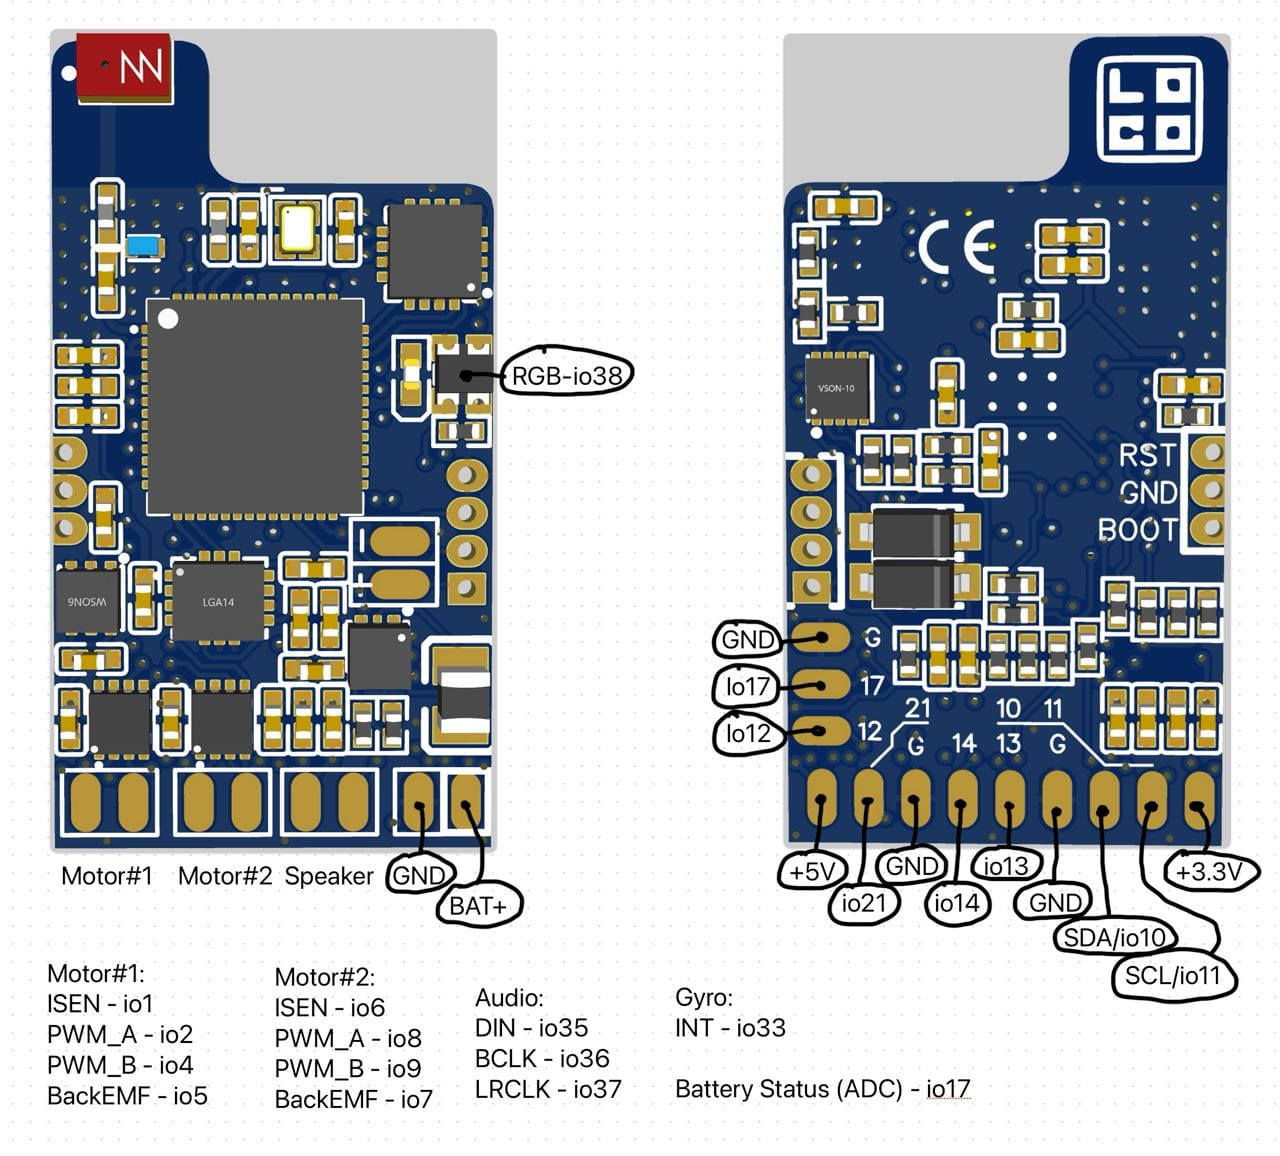
If you use a custom RC board, refer to the board's schematic.
Connecting a Servo Motor
Servo motors are controlled with PWM and require 5V power.
- Orange Wire (servo): Connect to IO21 (RC car board).
- Red Wire (servo): Connect to 5V (RC car board).
- Black Wire (servo): Connect to GND (RC car board).
Connecting a DC Motor
To control a brushed DC motor, use the built-in DC motor driver on the Loco RC board.
- DC Motor Wire A: Connect to Motor #1 outputs (any output).
- DC Motor Wire B: Connect to Motor #1 outputs (another output).
Connecting a Battery
To use a battery, you’ll need a battery controller for charging. The Loco module includes a battery controller for 3.6V batteries.
- Black Wire (battery): Connect to any GND (RC car board).
- Red Wire (battery): Connect to BAT+ (RC car board).
(Optional) Connecting LEDs (Lights)
You can connect LEDs to any IO pin on the RC car module. Each IO pin provides around 2.75V and up to 40mA. If required, solder a resistor to the LED circuit.
- "+" (LED): Connect to any IO pin (RC car board).
- GND (LED): Connect to any GND (RC car board).
(Optional) Connecting a Speaker
You can connect a small speaker to the Loco RC board to play sounds.
- Speaker Wires: Solder directly to the Speaker outputs on the RC board.
Firmware
All Loco.Engineering RC boards come pre-loaded with firmware that you can modify to add new features. If you build your own control board you should upload the firmware yourself:
- Source code: https://github.com/loco-engineering/arduino-rc-car.
- For questions: Email hey@loco.engineering.
Controlling the Car
You have two options to control your car:
- Web Browser Control:
- Power the car and connect to the WiFi network "loco-rc" (default password: "loco.eng") from a mobile device.computer.
- Open http://rc.local in a browser.
- Custom Remote Control:
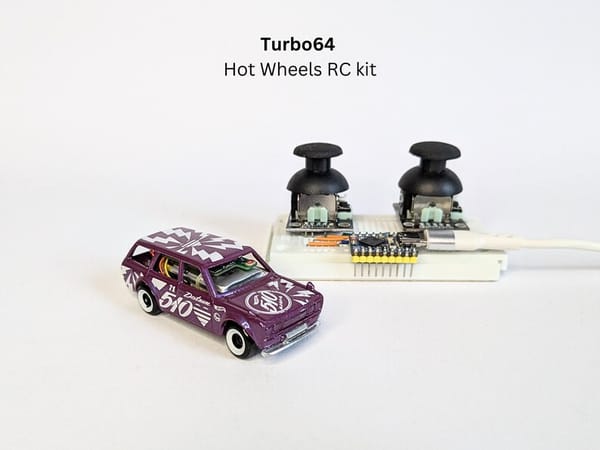
- Build a remote control using a breadboard, two joysticks, and an ESP32S3/C3 dev board.
- Upload the firmware for the remote from https://github.com/loco-engineering/arduino-rc-car.
What’s Next?
If you’ve connected everything correctly, you’ll have a functional RC car with steering, sound, and lights. This setup works for car scales 1:87, 1:64, 1:43, and 1:32, giving you flexibility in your builds.
For further questions or support, feel free to contact hey@loco.engineering.

