Getting started with DCC-EX (Digital Command Control toolkit)
In this guide, I will show how to get started with DCC-EX to control your model trains and the whole model railroad layout with a very affordable setup (around 60 EUR / 70 USD for the whole setup excluding DCC decoder costs). Why do we still use and show how to use DCC-EX when our project’s main goal is to replace Digital Command Control with Wireless Command Control? That’s simple - we all still have DCC decoders and trains/kits are still sold with DCC decoders. That’s why we need some solution to mix DCC and WCC decoders on the same layout. This is Part 1 of guides about how you can control your model railroad layout with DCC and WCC at the same time, where we set up DCC-EX hardware, upload DCC-EX firmware, and control a train, signal, and a turnout with DCC-EX (your train or layout accessory has to have a DCC decoder to be controlled from a DCC-EX command station).
DCC-EX is an open-source project (hardware, firmware, and software) that helps you control model railroad layouts. You can think that it’s a command station like a command station from Märklin, Roco, and others. However, DCC-EX is developed by people who are really passionate about model trains, and everyone can implement their own features. That’s why using DCC and WCC on the same layout is possible with DCC-EX only.
What you need for this guide
- A train with a DCC decoder or a layout accessory (a signal, for example) connected to a DCC accessory decoder (we tested steps described in this guide with our DCC/WCC accessory decoder, but almost any accessory decoder should work as well). If you want to build an accessory decoder yourself - check this guide.
- Parts described in the next chapter (DCC-EX hardware setup).
DCC-EX hardware setup
To start using DCC-EX, you need 2 boards (or PCBs or circuits) that can be ordered at our online shop or your local online shops:
- Arduino Mega or some equivalent.
- DC motor driver that can handle at least up to 15V and at least 2A (for big layouts, 5-10A is recommended). To avoid any issues with connections, we recommend using a DC motor driver that can be inserted into an Arduino board, for example, this board from our DCC-EX bundle.
- Power adapter, for example, 15V, 3A, that is used to charge laptops.
With those 2 boards, you will be able to control your layout from a computer over a USB cable using a web app (or a web throttle) or JMRI (an app for model railway automation).
Connect boards together
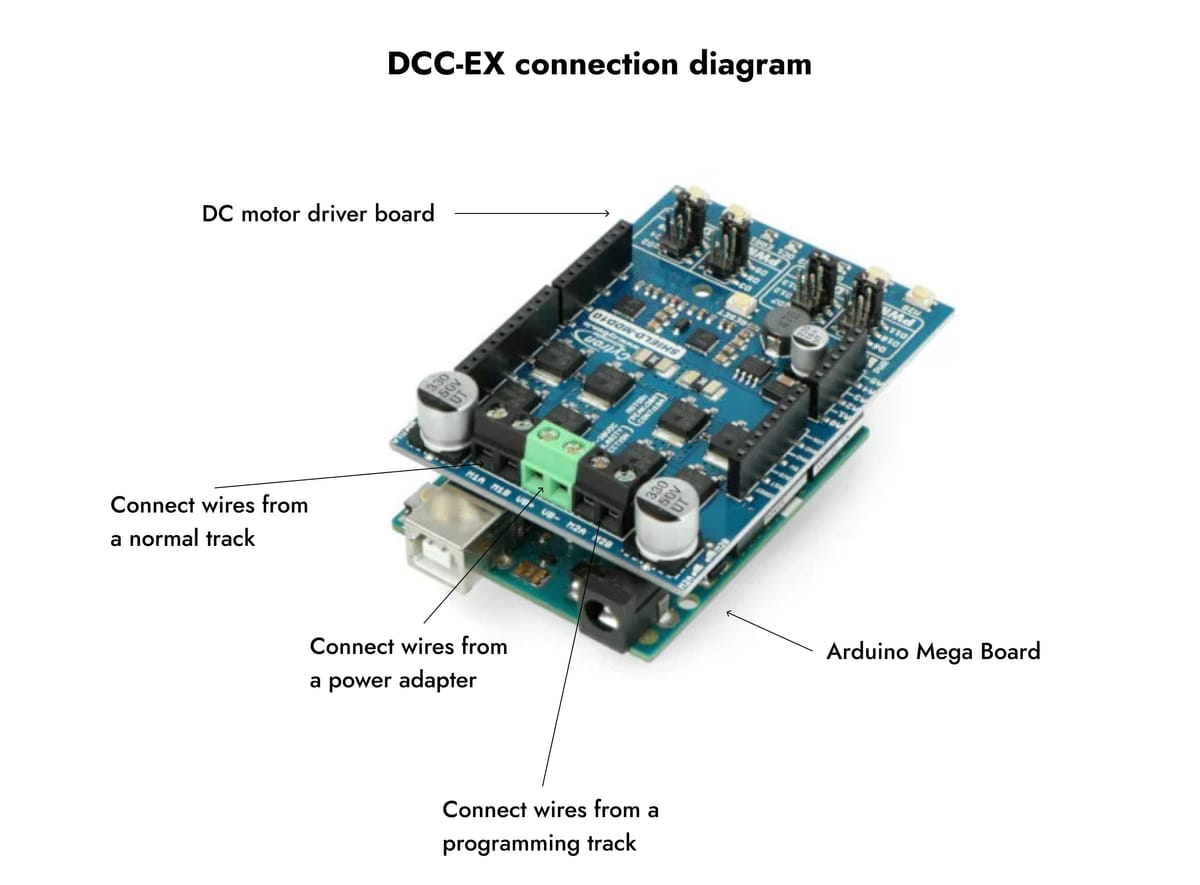
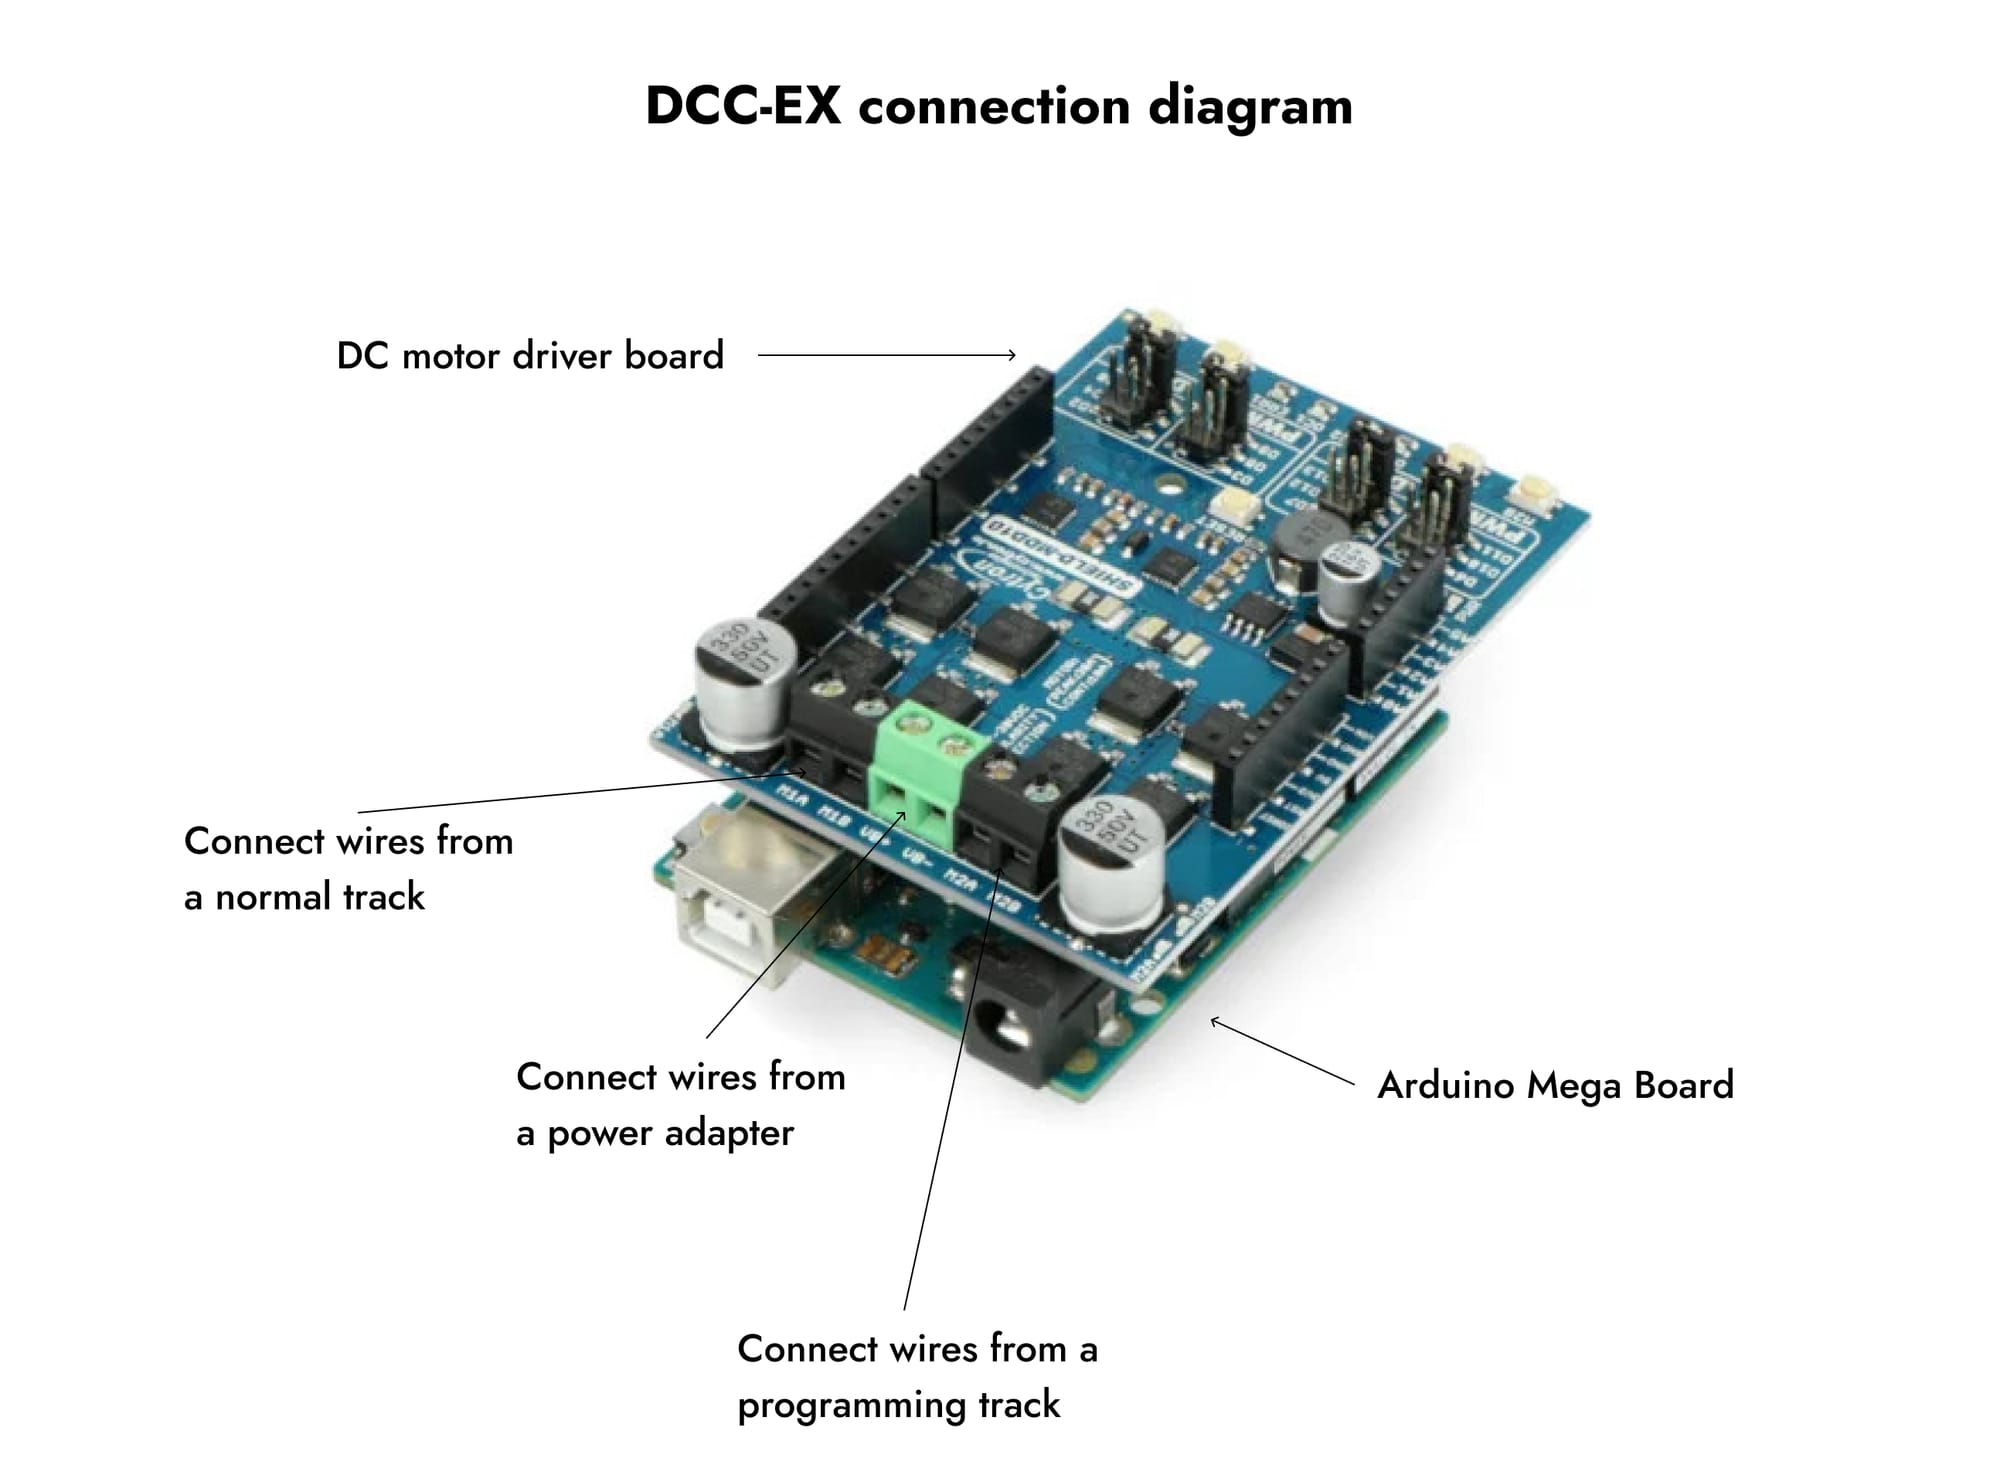
After you get all 3 parts from the previous chapter (2 boards and a power adapter), you should connect them together. If you use a DC driver designed to be connected with Arduino boards by inserting it into sockets, you should just insert a motor board into your Arduino board and connect wires from tracks to terminals on a DC motor board marked as outputs for motors (for example, M1A, M1B, M2A, M2B). A power adapter should be connected to terminals on a DC motor board that are marked as a power input. That’s it, your DCC command station is ready, and the final setup should look like as on a diagram below.
Upload firmware
To start sending DCC commands with a DCC-EX command station, you should upload a DCC-EX app to an Arduino board. This can be done without any knowledge of how to program an MCU and even without knowing what Arduino is. Just follow the guide at https://dcc-ex.com/ex-commandstation/get-started/installer.html#gsc.tab=0 - you should download the application available for Windows, Linux, and macOS, connect an Arduino board to a computer over USB, select required settings in the app, and click on Upload.
How to control trains with DCC-EX
There are 2 options for how you can control trains with DCC-EX. The simplest option is to connect your DCC-EX command station to a computer with a USB cable and open in a browser https://dcc-ex.com/WebThrottle-EX/. You will see a web app or web throttle that you can use to control trains directly from a computer or a mobile device in case it supports USB serial communication.
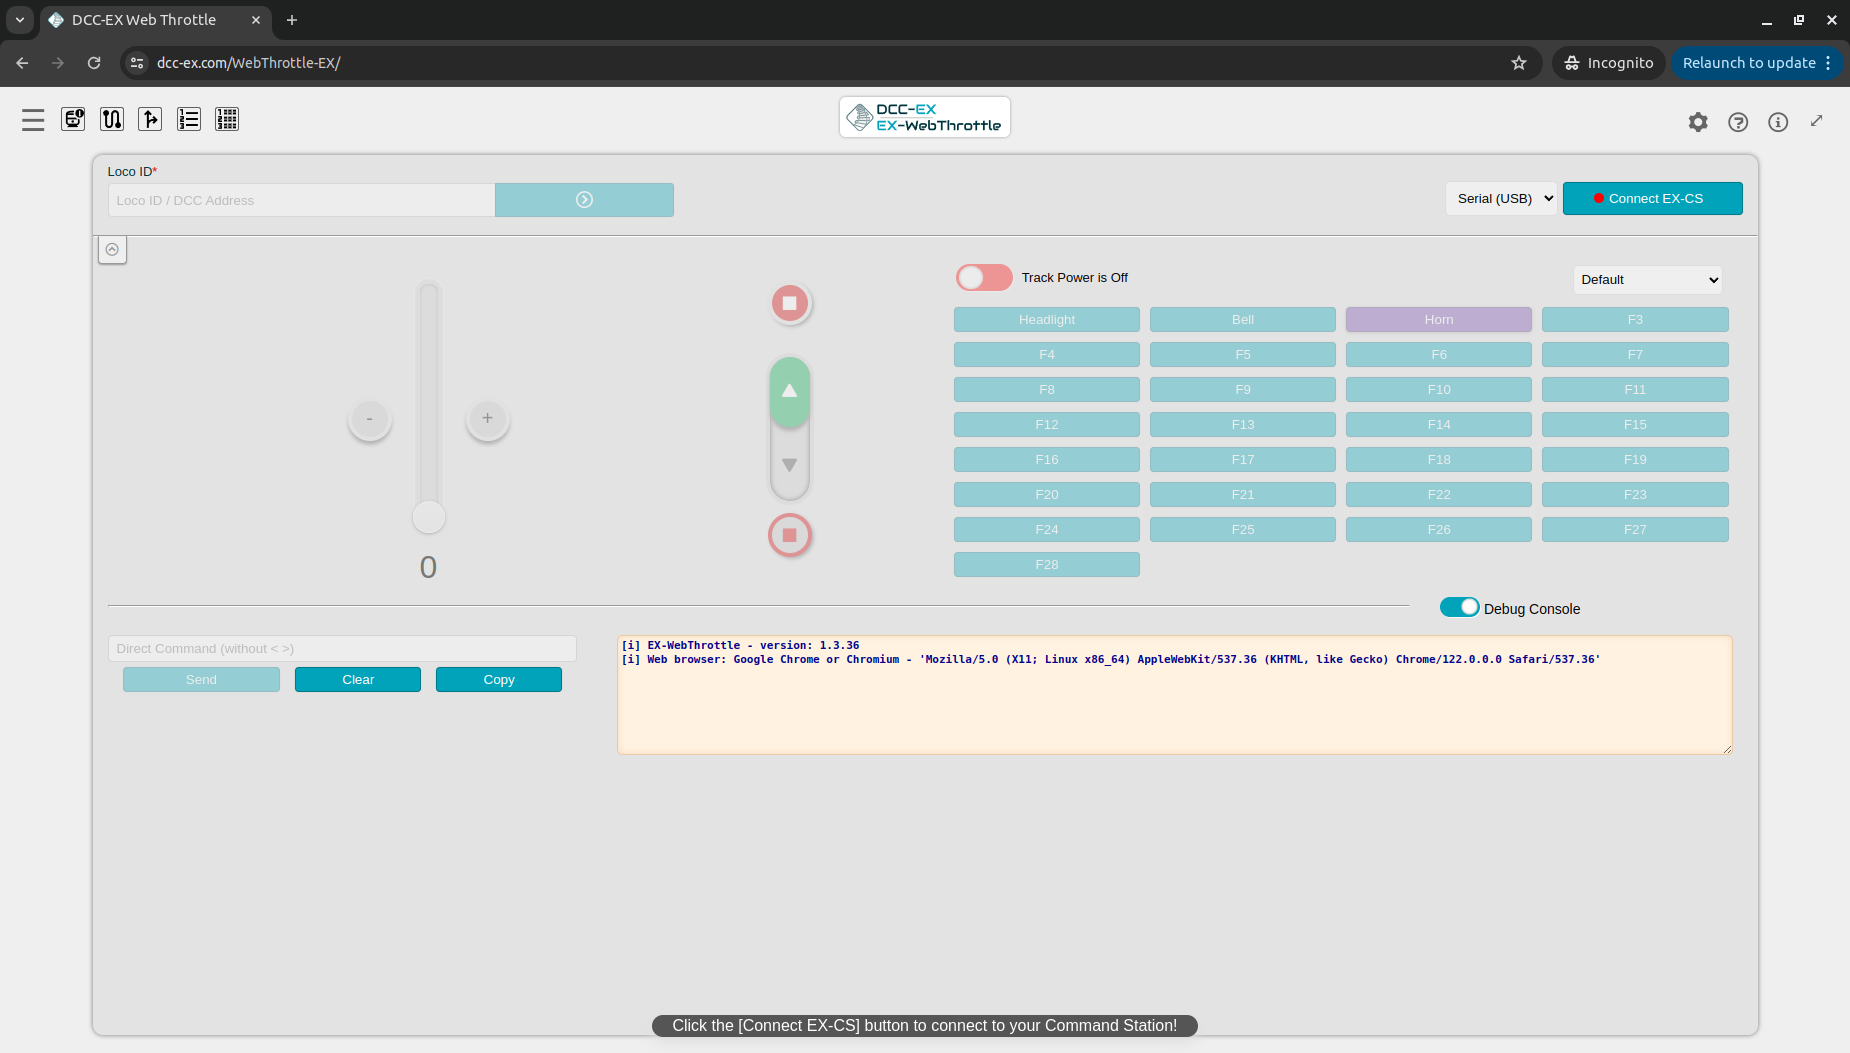
To use a DCC-EX web throttle is easy - just type in the address of your train and use controls to move it back/forward and enable/disable functions. Also, the web throttle allows you to program DCC decoders.
How to control signals, turnouts, and other accessories with DCC-EX
DCC-EX web throttle doesn’t let you control layout accessories like signals, turnouts, and others. To control them, you can use JMRI - an application for model railroad automation. Let’s check how to control a signal (don’t forget that your signal should be connected to a DCC accessory decoder and that DCC decoder should respond to DCC Signal packets).
- Download and install JMRI - follow the guide here https://www.jmri.org/help/en/html/setup/index.shtml.
- Connect the DCC-EX command station to the computer by a USB cable.
- Launch PanelPro.
- Select in the top menu bar Tools → Tables → Signals → Signal Heads.
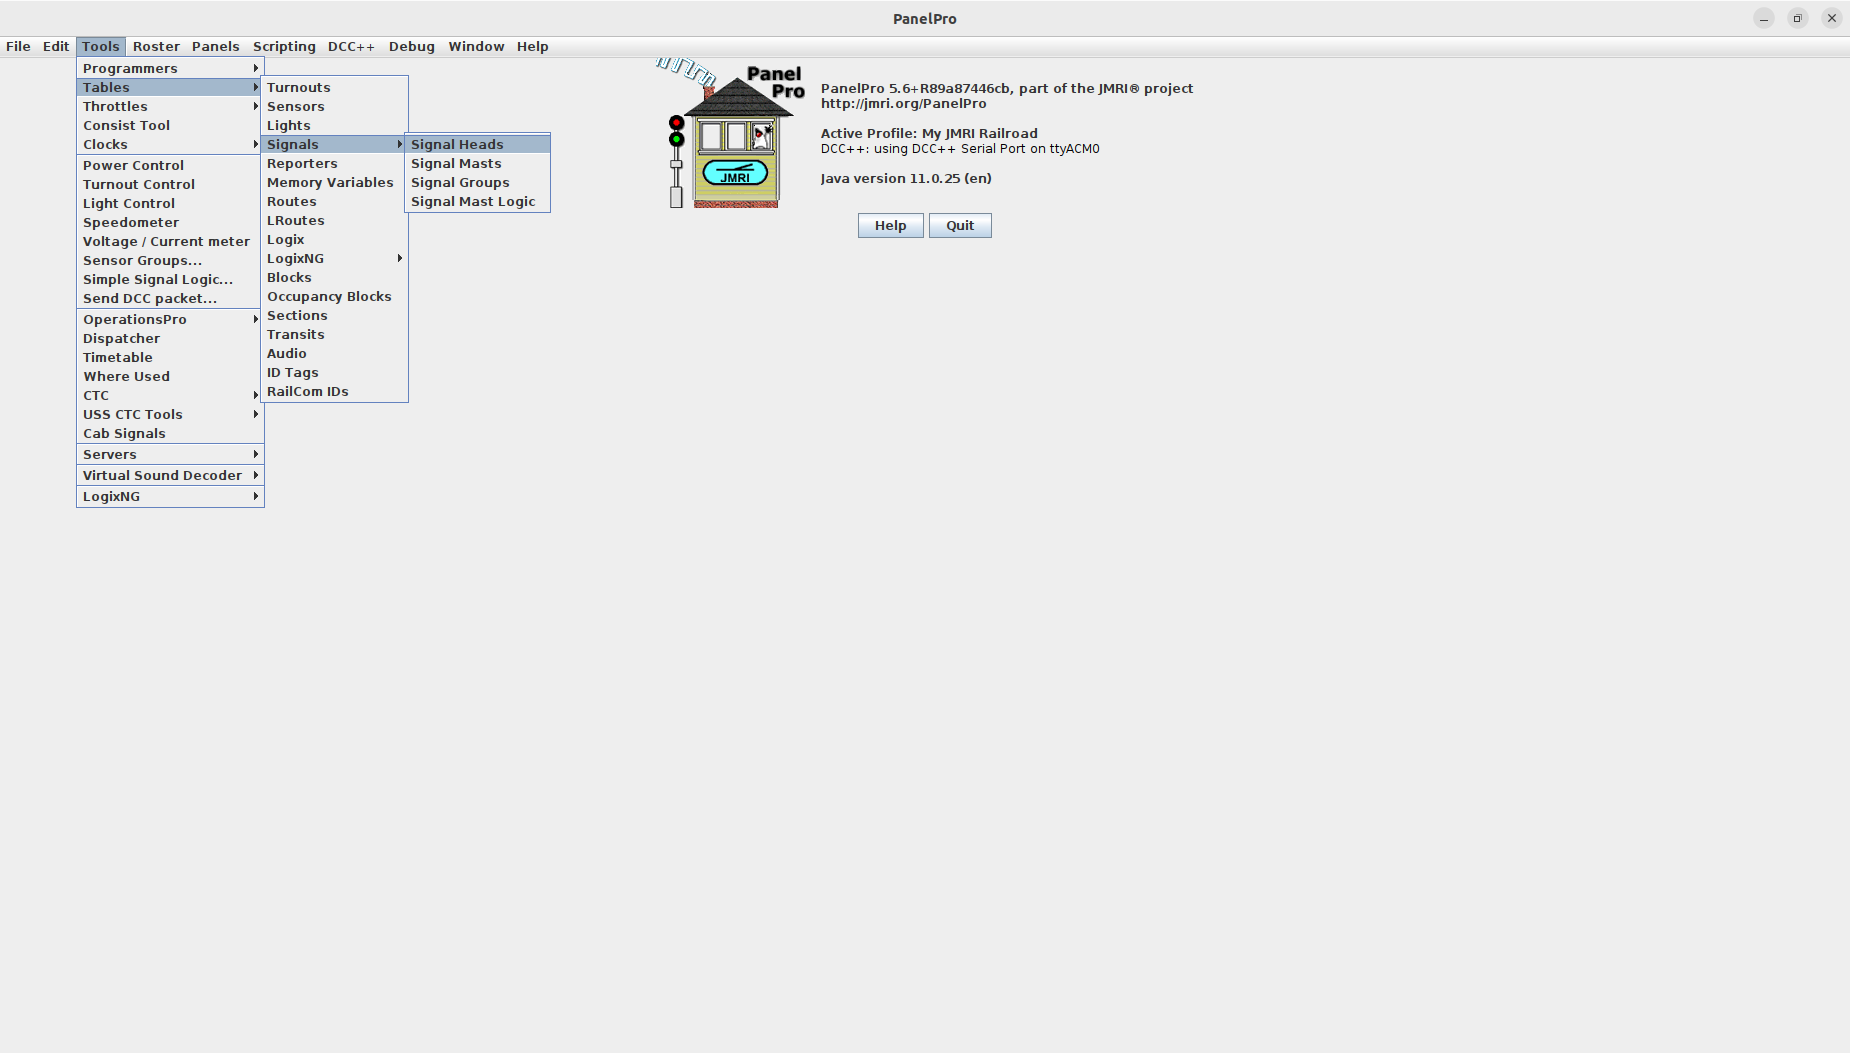
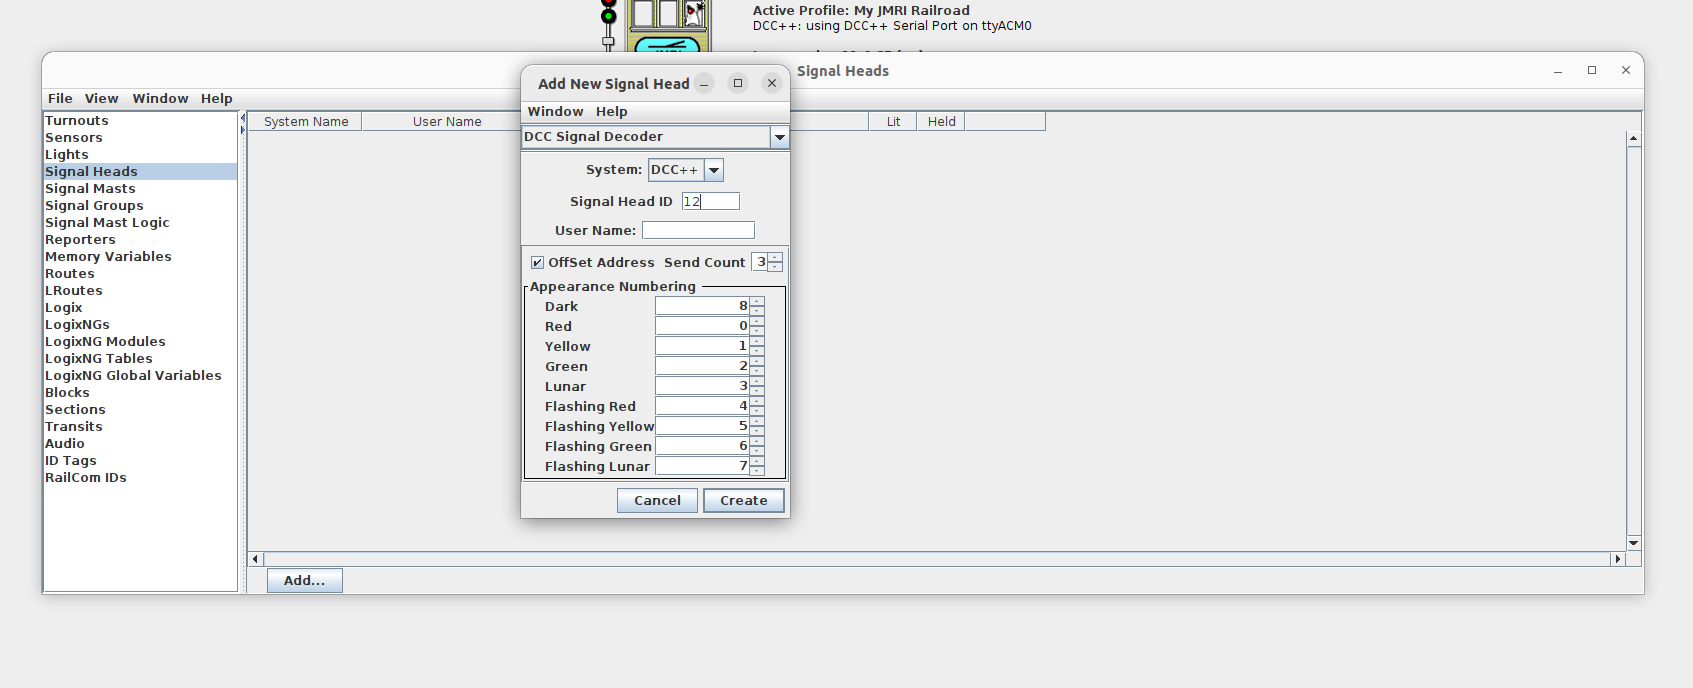
Click on Add…and select in an opened window:
- DCC Signal Decoder from the Top dropdown (by default, the “Double Output” option is shown).
- Type in the DCC decoder address.
- Select Offset address (required with some decoders, so try to select and check if a signal responds to commands from JMRI; if not, try again with the disabled Offset address option).
- Click Create.
- To change a signal state, just select which state should be active by selecting an option in the Appearance column.
That’s it. Now you have a fully functional DCC command station that you can control straight from your computer with additional proprietary tools. Simple and clean setup. However, it can be even improved more by using Wireless Command Control instead of Digital Command Control. The next part will describe how to mix both protocols and make migration from DCC to WCC easier and have the possibility to have DCC and WCC (for example, for two-way communication between trains, NFC readers, or hall sensors without any wires) on the same layout.
Feel free to contact us at hey@loco.engineering in case of any questions or feedback.

